Creating a Custom Display
The Custom Display can be used to create a single line diagram or visualize other substation data from multiple IEDs.
Multiple custom displays can be created for a workspace. These custom displays are saved as part of the workspace so that they can be loaded with the workspace.
Adding Data Objects to the Custom Display
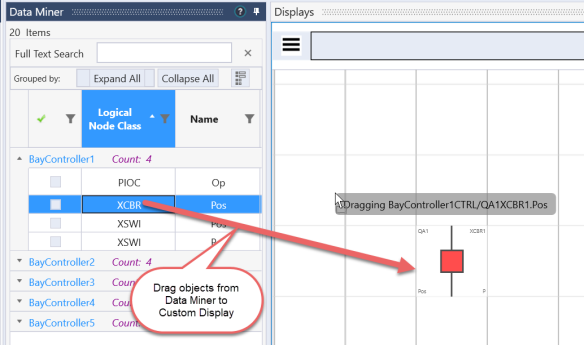
1) Select the Data Miner tool on the left side and select data objects
2) Select the Custom Display on the right side
3) Drag data objects from the Data Miner onto the Custom Display. This will add the data objects to the display as a graphical tile.
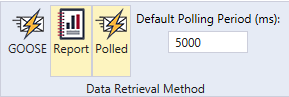
4) The value (and time/quality if available) for the data object is retrieved using GOOSE, reports, or polling based on how the Data Retrieval Method is set.
Learn more about graphical tiles
Example: in the example below, Report and Polled are selected as data retrieval methods. When the object is added to the display, the tool establishes a connection to the IED with this data and requests the data from the IED through a report (if available) or by polling the data object directly from the IED. GOOSE could be used if selected.
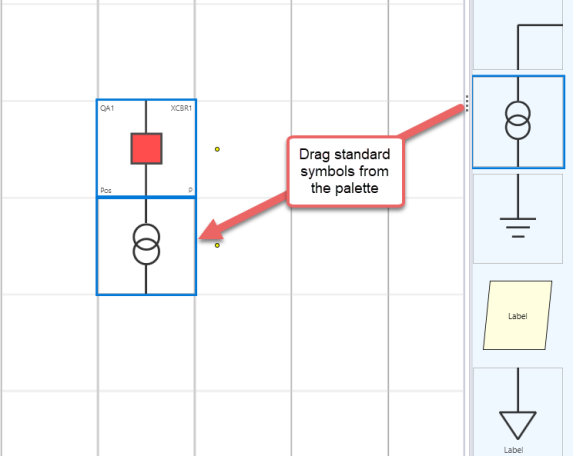
Add Single Line Symbols
Symbols for a single line diagram are located in the Palette on the right. These can be added by dragging a dropping to the Custom Display.
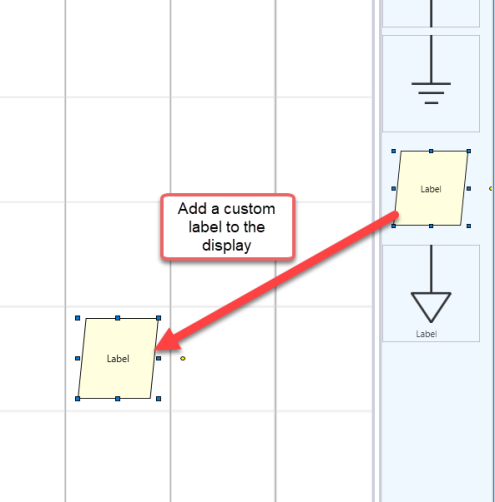
Add Custom Labels
Custom labels can be added from the Palette.
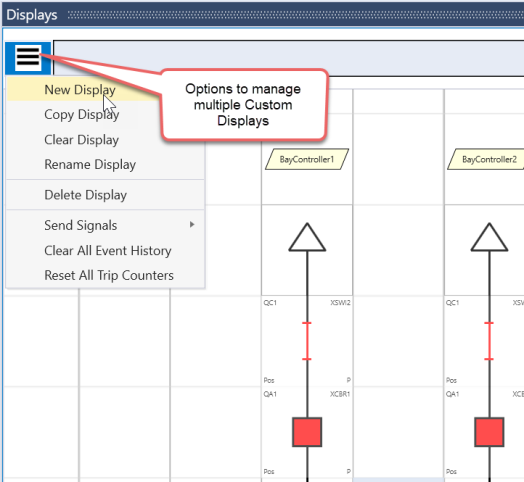
Create Multiple Displays
1) Click on the Menu button on the Custom Display
2) Select 'Copy' to add another custom display with the same objects
3) Select 'New Display' to add another custom display that is blank
4) Select 'Rename' to change the name of the current display
Interacting with tiles
1) Selecting a Tile:
-> Single left mouse button click on a tile
2) Moving a tile:
-> Select a tile by clicking on it.
-> Click on the selected tile and move it
3) Panning the Display:
-> Click on the mouse left button and drag
4) Deleting a Tile:
a) Using the Keyboard
-> Select a tile by clicking on it.
-> Use the 'Delete' key on the keyboard to delete the tile
b) Using the Mouse
-> Right click on a tile to open the context menu
-> Use the 'Delete' option in the context menu to delete the tile
5) Copying a Tile:
a) Using the Keyboard
-> Select a tile by clicking on it.
-> Use the key combination 'CTRL '+' C' on the keyboard to copy the tile.
-> On the canvas click where you want the tile to be placed.
-> Use the key combination 'CTRL '+' V' on the keyboard to paste the tile.
b) Using the Mouse
-> Right click on a tile to open the context menu
-> Use the 'Copy' option in the context menu to copy the tile
-> Right click anywhere in the canvas where you need the tile to be copied to.
-> In the context menu select the option 'Paste' to paste the tile
6) Zooming IN:
a) Using the Keyboard
-> Click anywhere on the display to bring it into focus(if it is not already focused)
-> Use the key combination 'CTRL ' + ' +(add) on the keyboard to zoom in.
b) Using the Mouse
-> Click anywhere on the display to bring it into focus(if it is not already focused)
-> Mouse wheel up action will let you zoom in to the display
7) Zooming Out:
a) Using the Keyboard
-> Click anywhere on the display to bring it into focus(if it is not already focused)
-> Use the key combination 'CTRL' + '-(subtract) on the keyboard to zoom out.
b) Using the Mouse
-> Click anywhere on the display to bring it into focus(if it is not already focused)
-> Mouse wheel down action will let you zoom in to the display
Note: custom displays are saved in the current workspace and can be loaded with a saved workspace.